Scanning Overview
Hover your cursor over each field to view a brief description of its functionality of the Preview Image window or review the table below for brief descriptions of each field.
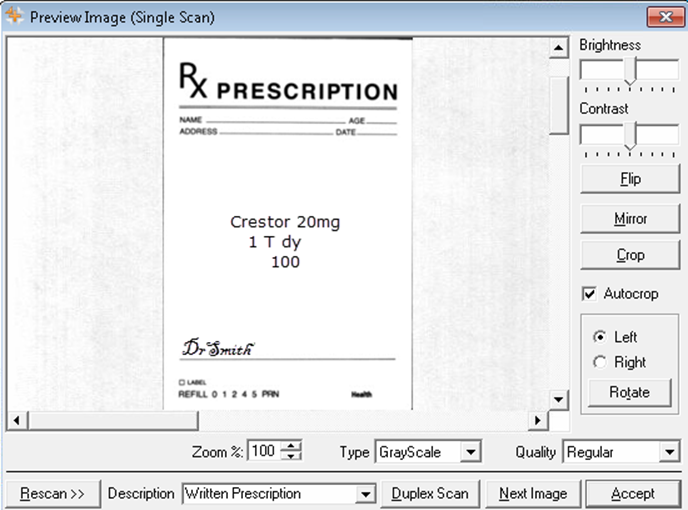
Table: Preview Image Scan Window
| Field | Description |
| Brightness | Control the brightness of the scanned document |
| Contrast | Control the light-dark contrast of the scanned document . |
| Flip | Turn the scanned image horizontally. |
| Mirror | Turn the scanned image vertically . |
| Crop | Trim sections of the image. |
| Autocrop | Image will automatically be trimmed to the size of the scanned image. |
| Rotate Left/Right | Rotate the scanned image 90°, 360°, left or right, depending on what you selected. |
| Zoom % | Adjust the zoom size using the arrows or manually typing in the percentage amount. Default zoom size is set to 100%. |
| Type | By default, documents are scanned in grayscale with regular resolution. |
| Quality |
You can change quality of the scan resolution to one of these options:
Note: Selecting High Quality will take up more disk space than a regular grayscale image. |
| Rescan | Enables you to rescan the image if the initial scan is not satisfactory . |
| Description | Select a description of the image from the dropdown list to help identify the image. |
| Next Image | Used when scanning multiple pages. User can scan more than one scanned image. |
| Accept | Selecting the Accept button closes the Preview Image window. |